
You just got out of a 90-minute interview. The recording is sitting on your laptop, and you want a transcript you can actually work with — quote from it, summarize it, pull the good bits into a doc.
The usual routine: find a transcription site, upload the file, wait, download the result, copy it, paste it into Claude, then start the work you actually cared about.
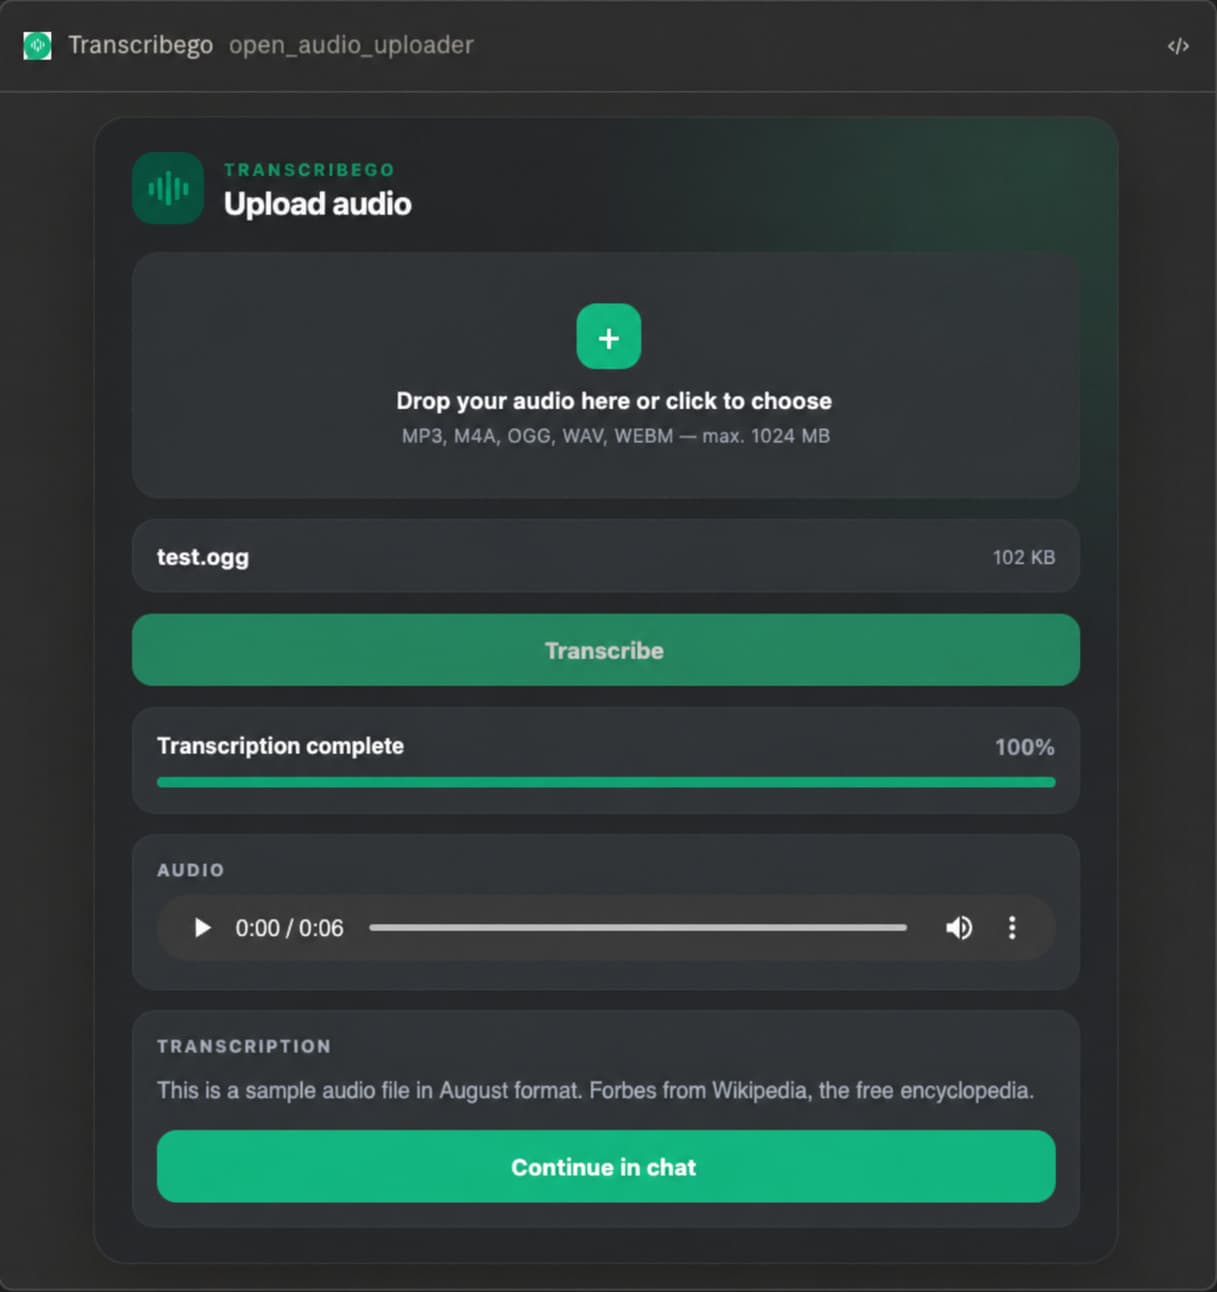
TranscribeGo removes the middle. You connect it once, and after that you just ask:
Transcribe this recording and pull out every question the candidate asked.
The transcript never has to touch your clipboard.
First, the only jargon in this post
TranscribeGo connects to your assistant over MCP — a shared standard for letting AI apps talk to outside services. That's the whole explanation. You don't need to understand it any more than you need to understand USB to plug in a mouse.
What matters is that there are two ways to plug it in, and picking the right one takes about ten seconds.
The two versions
| Connector | Local proxy | |
|---|---|---|
| Setup | Paste a URL | One command, needs Node 20+ |
| Runs | On our servers | On your machine |
| Works in | Claude.ai in the browser, and other apps that accept a connector URL | Claude Code, Cursor, Claude Desktop |
| Local files | You pick them in an upload window | You name them by path |
| Best for | Most people | Terminal and editor work |
Both use the same TranscribeGo account and produce the same transcripts. The real difference is whether it can see your hard drive.
The connector can't. It runs on our servers, so it has no idea what's on your laptop — you hand it files through an upload window, the same way you'd attach something to an email.
The local proxy can. It runs on your machine, so you can point at a file by name and it takes it from there.
Rule of thumb: if you use Claude in a browser tab, take the connector. If you use Claude Code or Cursor and your recordings live in folders you can name, take the local proxy.
Option 1: the connector
Nothing to install.
- Open your assistant's Settings → Connectors.
- Choose to add a custom connector.
- Paste:
https://api.transcribego.com/mcp - Sign in to TranscribeGo when the browser asks.
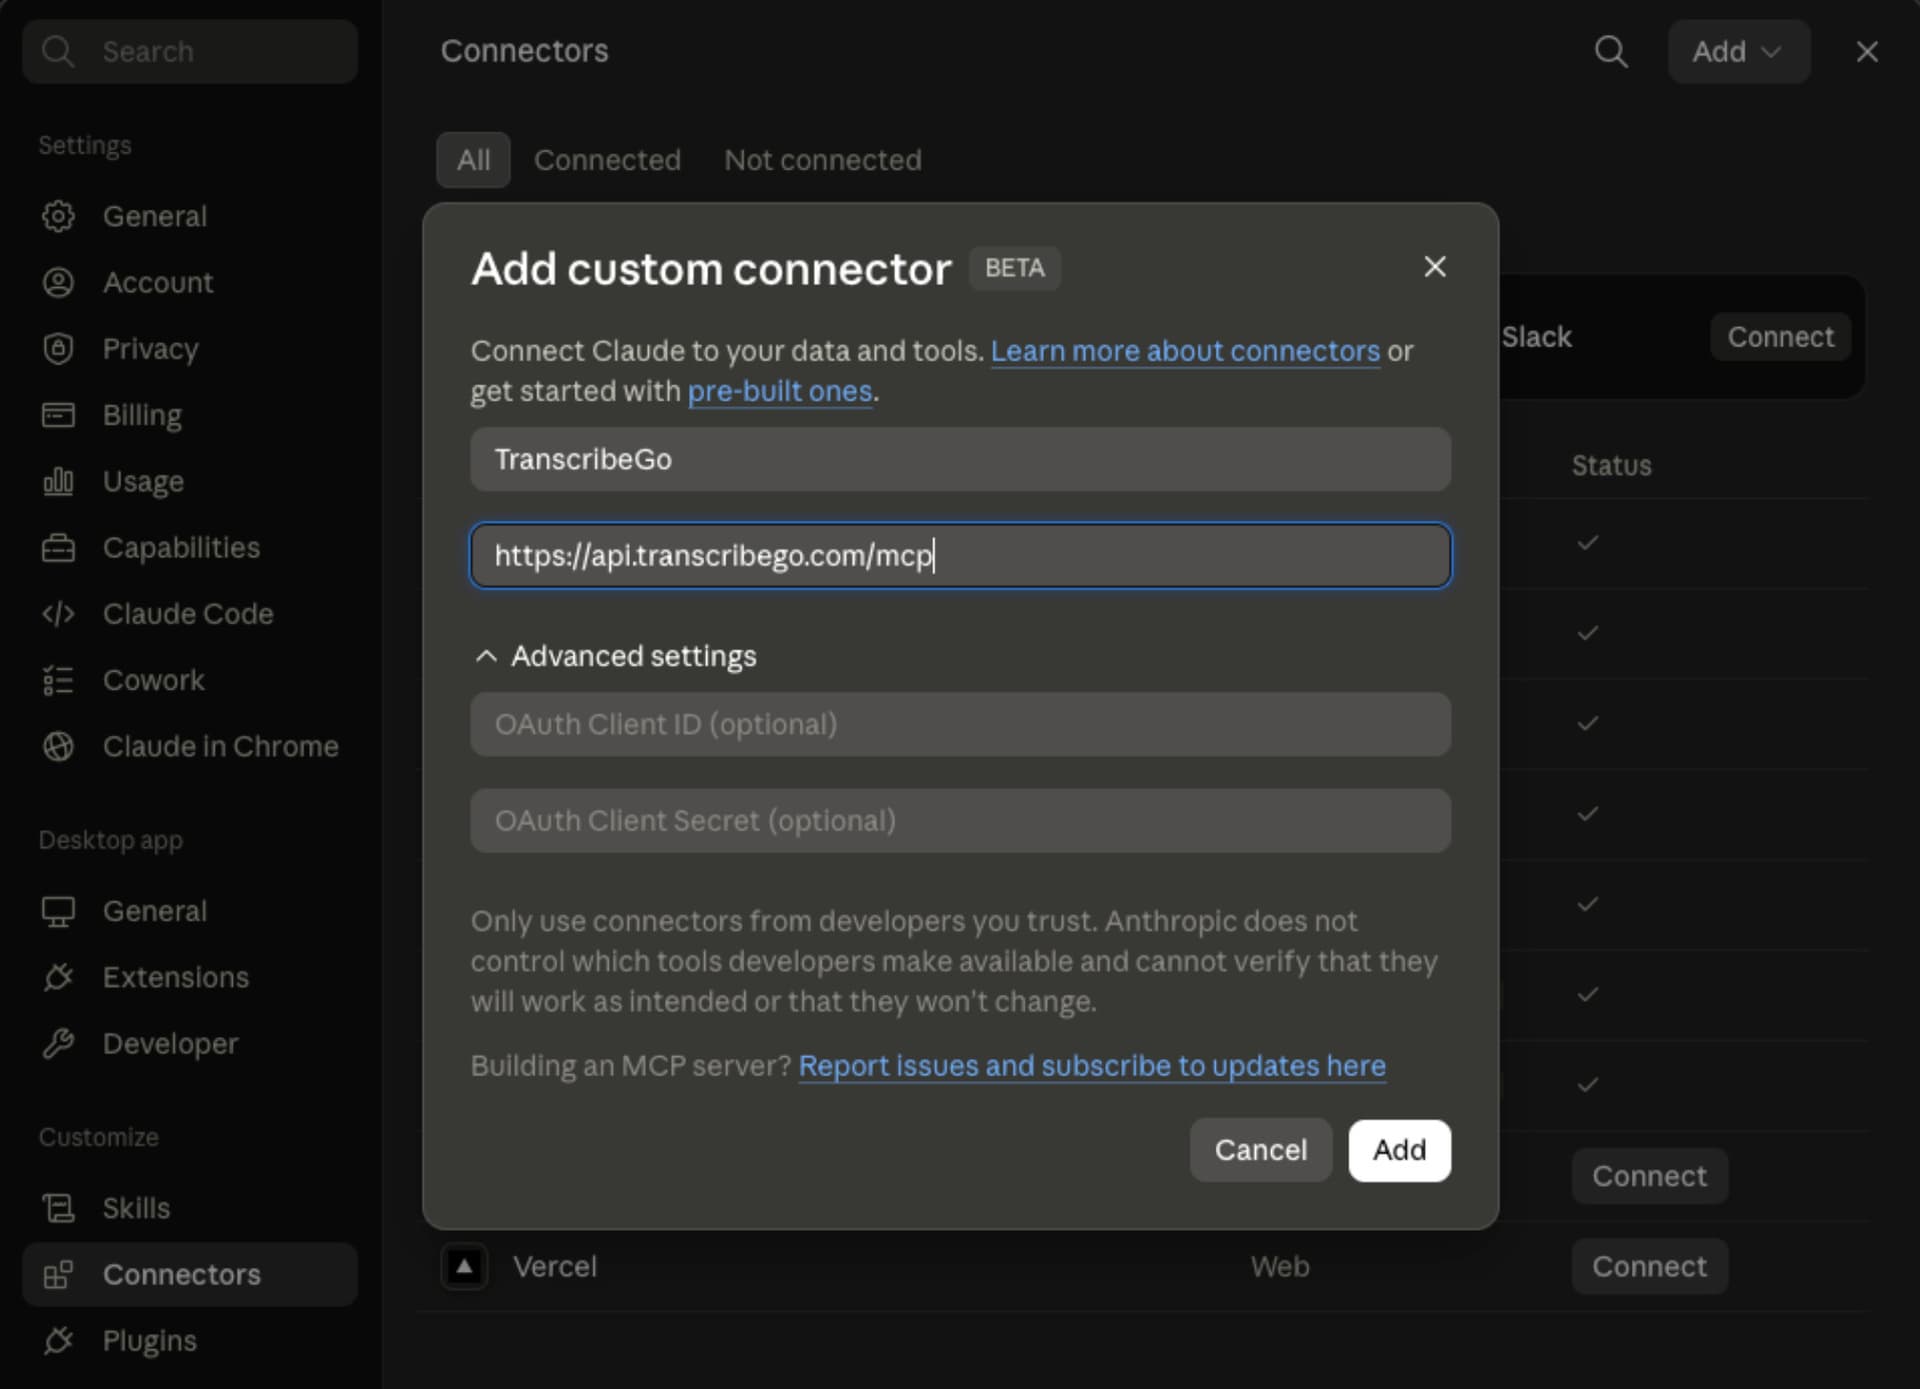
That's it. You'll be asked to approve access once, and you're done.
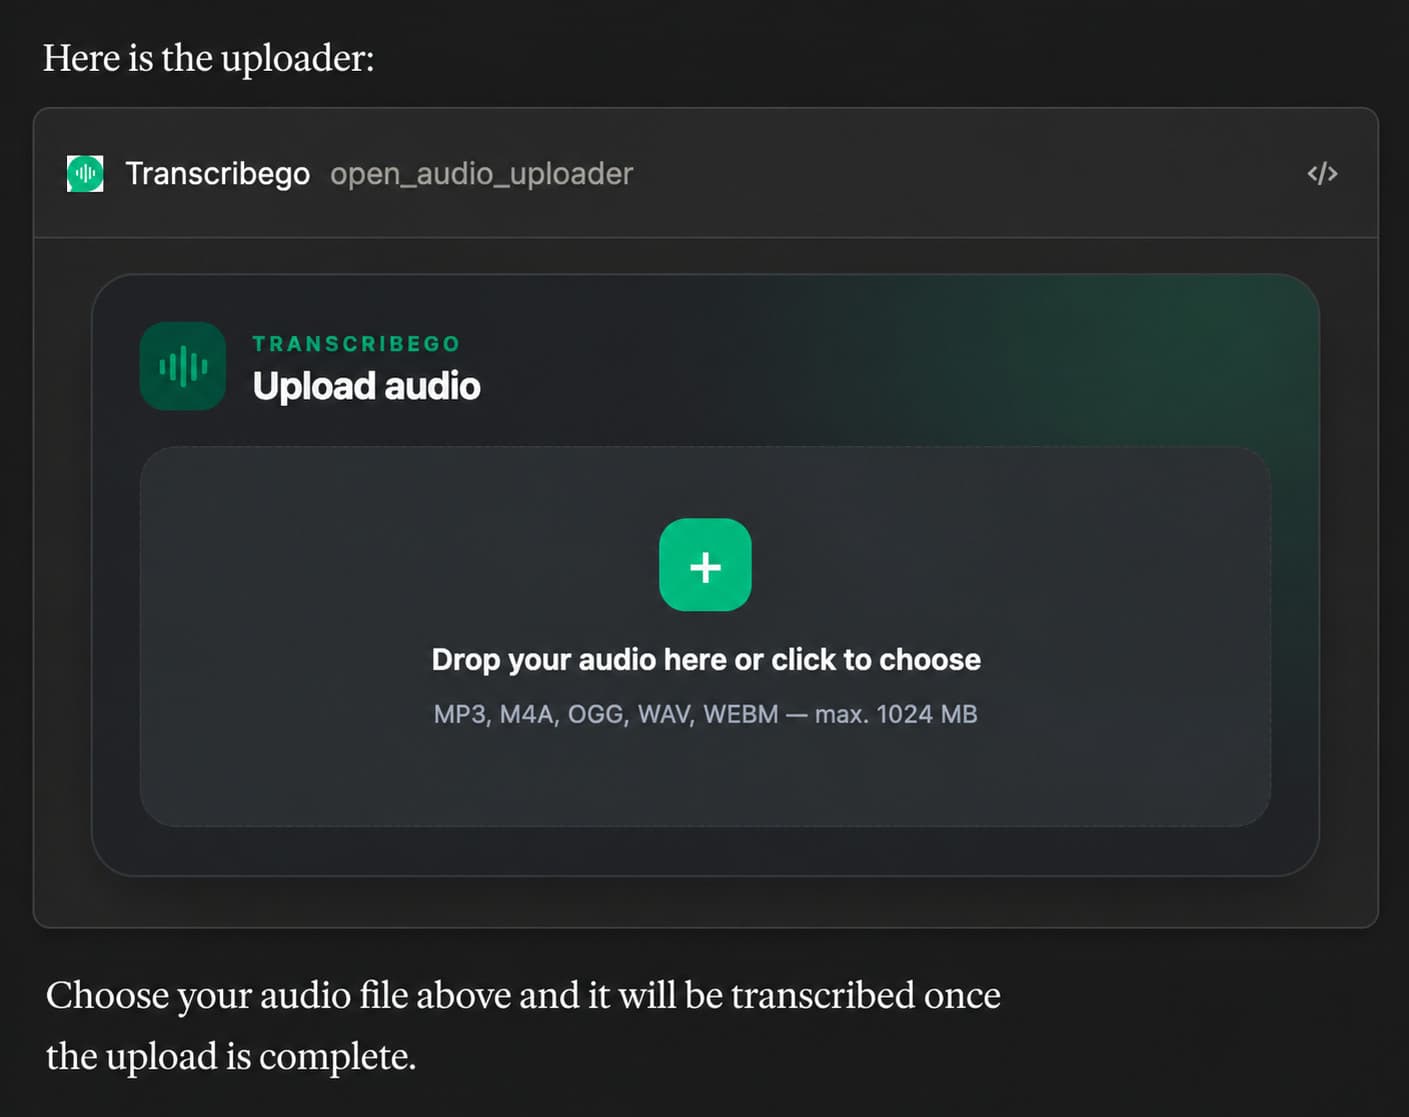
To hand it a file, ask for the uploader:
Open the TranscribeGo uploader.
A small window appears right in the conversation. Pick your file, and it uploads and transcribes without ever being attached to the chat.
Option 2: the local proxy
If you work in a terminal or an editor, this is the better fit.
Claude Code:
claude mcp add transcribego -- npx -y transcribego-mcp
Claude Desktop or Cursor — add this to your MCP config:
{
  "mcpServers": {
    "transcribego": {
      "command": "npx",
      "args": ["-y", "transcribego-mcp"]
    }
  }
}
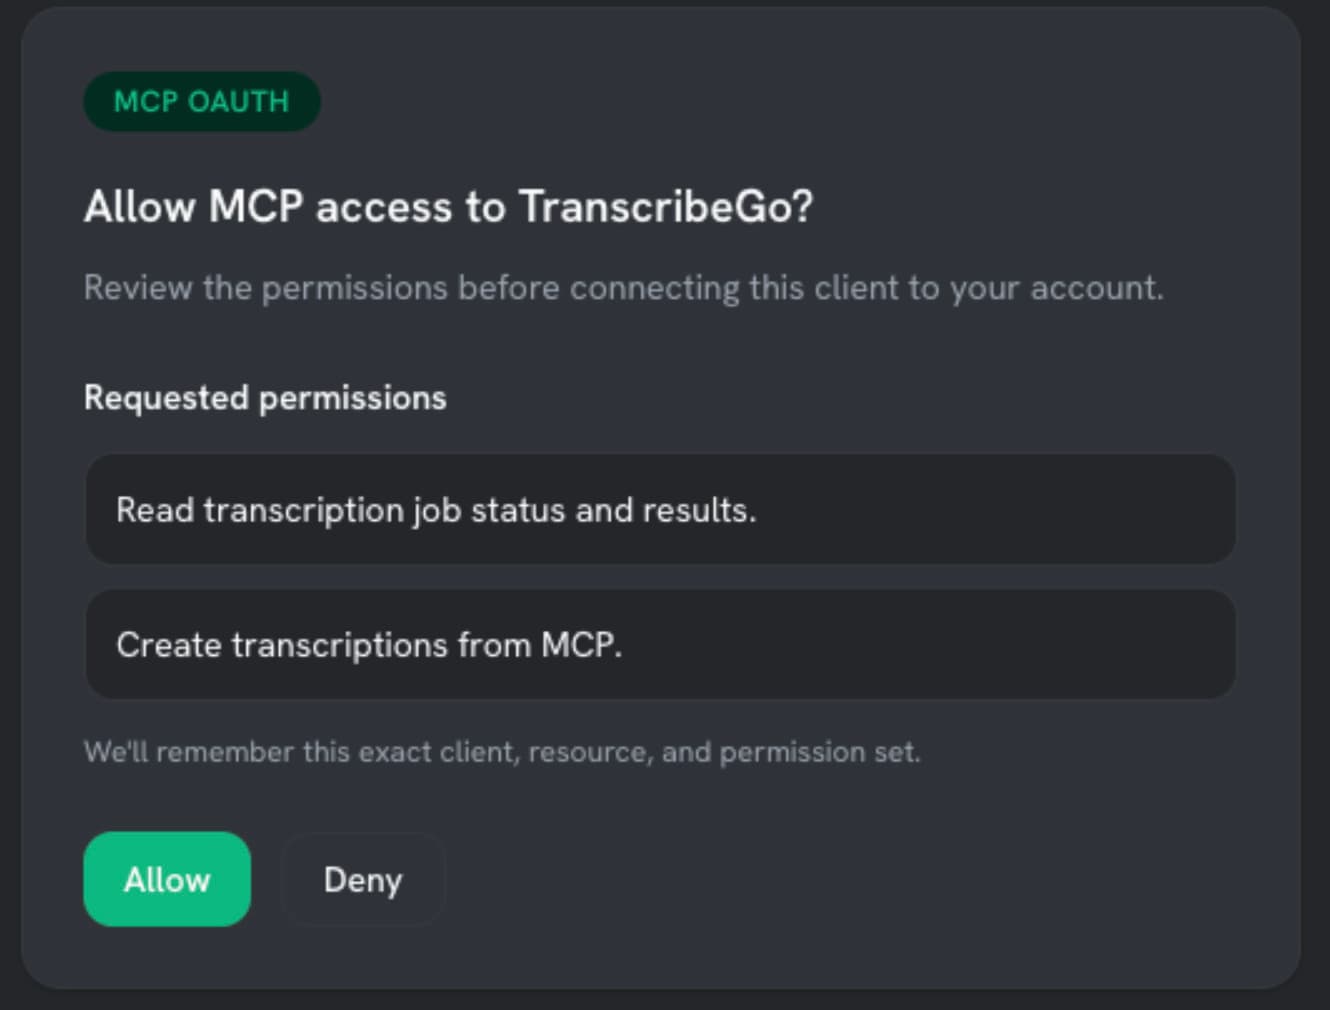
The first time it runs, your browser opens so you can authorize your TranscribeGo account. Your credentials are saved locally with owner-only permissions and refreshed automatically. You sign in once, not once per session.
Now you can name files:
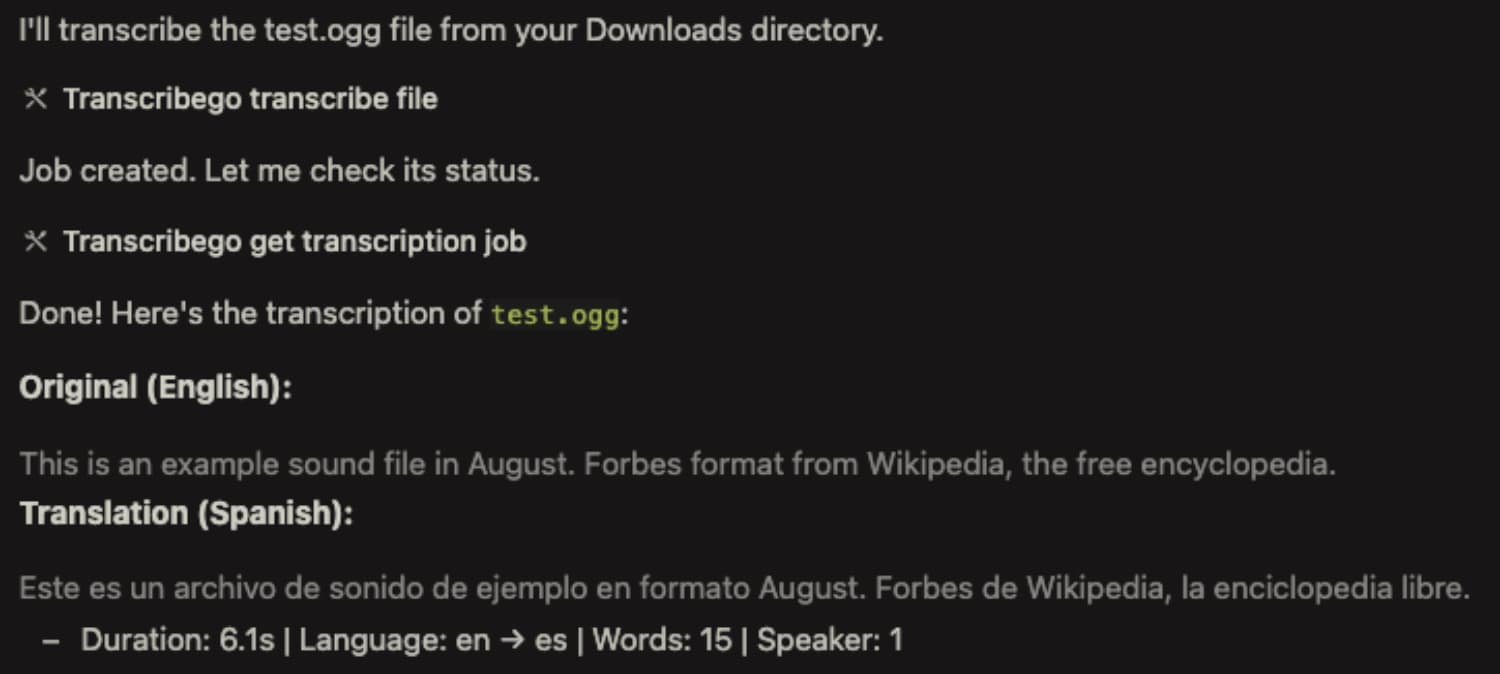
Transcribe ~/Recordings/interview.m4a and give me the timestamps where pricing comes up.
The proxy does everything the connector does, plus this. It's a superset — there's no feature you give up by choosing it.
What to ask for once it's connected
Plain language works. A few things people reach for:
- A file on your disk — "Transcribe ~/Desktop/standup.mp3." (Local proxy.)
- Something online — "Transcribe this: youtube.com/watch?v=…" — YouTube, Instagram, TikTok, Facebook, and Vimeo links all work, as do direct links to audio files. (Both versions.) Our guide on transcribing YouTube videos covers what you get back.
- A long recording — start it and keep working. Long files process in the background, and your assistant can check on them and tell you when the transcript is ready. See transcribing long audio files for how that pipeline behaves.
- Something you already did — "What have I transcribed this week?" It can look back through your recent transcripts and pull one up again, so you don't have to remember what you called it or go hunting for the file.
- A link to send someone — "Make a share link for that transcript." You get a permanent public page, optionally including the audio. It can't be revoked from chat, so only make one when you mean it.
Try TranscribeGo Free
10 free minutes. No credit card required.
Limits worth knowing
- Size: up to 1 GB per file. That's a very long recording — hours of audio.
- Formats: MP3, M4A, MP4, OGG, WAV, and WebM cover almost everything a phone or laptop records. The same list the web app accepts — see the complete guide to transcribing audio files.
- Pace: roughly 5 files a minute. You'll only notice if you're bulk-processing.
Where your audio actually goes
Worth being precise, because "upload" is doing a lot of work in most tools.
When you transcribe a local file — either through the uploader window or by naming a path — the audio goes straight from your machine to storage. It isn't attached to your conversation, and it doesn't pass through the TranscribeGo server on the way. That's what makes a 1 GB file practical rather than a thing you wait around for.
When something goes wrong
- The browser never opened. The sign-in link also gets printed in the terminal. Open it by hand.
- It won't authorize, or it worked yesterday and doesn't now. Reset and sign in fresh:
npx transcribego-mcp --reset-auth
- "Unsupported format." Convert to MP3 or WAV. Some containers share an extension with formats we don't handle, so the extension alone can be misleading.
Which one, again?
Browser → connector. Terminal or editor → local proxy. Not sure → connector, because there's nothing to install and you can add the proxy later without redoing anything.
Either way, the recording stops being a chore and starts being something you can just ask about.
Frequently Asked Questions
What is MCP, in one sentence?▾
MCP is a shared standard that lets AI assistants talk to outside services. TranscribeGo publishes an MCP server, so any assistant that speaks MCP can transcribe audio through your TranscribeGo account without you leaving the conversation.
Do I need a TranscribeGo account?▾
Yes, and you sign in to it during setup. The same account works across the web app, WhatsApp, Telegram and MCP, so a transcript you create from your assistant shows up in your dashboard at transcribego.com like any other.
Which one should I pick, the connector or the local proxy?▾
If you use your assistant in a browser tab, take the connector — there is nothing to install. If you work in a terminal or an editor and your recordings live in folders you can name by path, take the local proxy. The proxy is a superset, and you can add it later without redoing the connector setup.
Can it transcribe a file that's on my computer?▾
Both versions can. The connector opens a small upload window inside the conversation and you pick the file there. The local proxy runs on your machine, so you can just name the path — "transcribe ~/Recordings/interview.m4a" — and it handles the rest.
Is my audio attached to the conversation?▾
No. Local files go straight from your machine to storage; they are never attached to the chat, and they don't pass through the TranscribeGo server on the way. Your assistant receives the transcript, not the audio.
What file sizes and formats are supported?▾
Up to 1 GB per file, in MP3, M4A, MP4, OGG, WAV or WebM. Uploads are paced at roughly 5 files a minute, which you'll only notice if you're processing a batch.
Can I transcribe a YouTube or TikTok link instead of a file?▾
Yes, with either version. Paste the link and ask for a transcript — YouTube, Instagram, TikTok, Facebook and Vimeo pages work, as do direct links to audio files.
How do I sign out or reset the connection?▾
For the local proxy, run npx transcribego-mcp --reset-auth and authorize again next time it starts. That's also the fix if authorization worked yesterday and stopped working today.
